![EFLogo_Black-1.png]](https://knowledge.edgefactor.com/hs-fs/hubfs/EFLogo_Black-1.png?width=240&height=53&name=EFLogo_Black-1.png)
As an educator with a Premium Edge Factor membership, you can create unlimited classes, and assign resources for students to access and complete at school or home. This guide walks you through setting up your class and sharing it with students.
How to Create a New Class
Step 1: Go to Your Classes
-
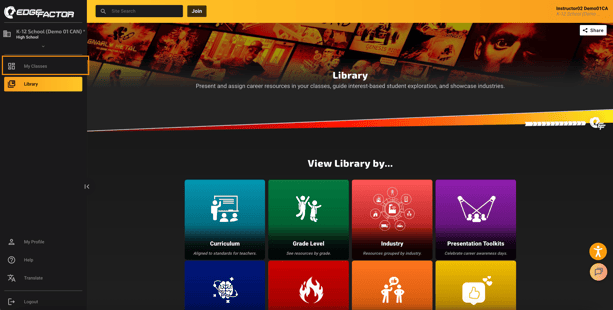
Log in to your Edge Factor account and click on the "My Classes" tab in the left side bar.
Step 2: Create a new class
- Select the "+ New Class" button located in the top right-hand corner. A window will open asking for a few basic details:
- Class name (e.g., "Period 3 – Intro to Engineering")
- Short class description (e.g, "Learn more about a careers in Engineering.")
- Select a class colour
- Then click "Create Class"
Tip: Use a class name your students will recognize. They will see it when they login, so keep it clear.
Step 3: Save the Class & Get Your Join Code
-
Once you've created your new class, a unique join code is generated.
-
Share this code with your students.
-
When they login they can click the join button and join the class and see published assignments.
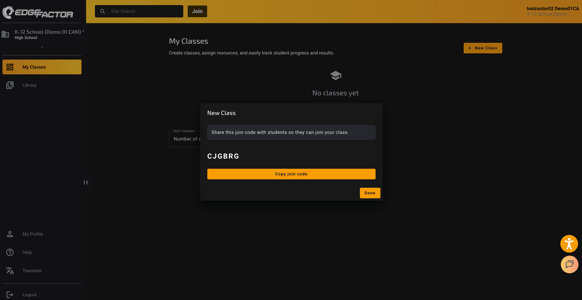
Tip: Share the join code verbally, on a slide, or through your school's messaging app. Each class has its own unique code.
Step 4: Edit Class Details Anytime
-
Plans change; you can update a class's name and description at any time.
-
Open the class, click the pencil to edit, make your changes, and save.
-
.png?width=590&height=332&name=Add%20Resources%20to%20Assignment%20(edit).png)
How to Add an Assignment?
Step 1: Create an Assignment
-
Inside your class, click "New Assignment".
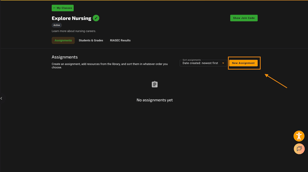
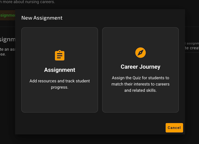
Tip: For the purposes of this guide, we're going to select "Assignment." Allowing you to select resources from the Edge Factor library to create a customized assignment for students.
-
Give the assignment a title, description, and set a due date.
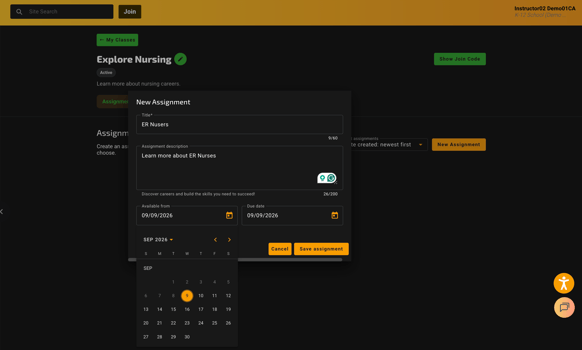
- Then click "Save Assignment".
Step 2: Manage Your Assignment
-
Once you've created your assignment details, it's now time to click "Manage."
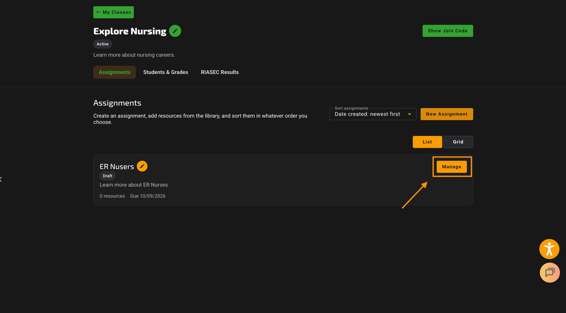
-
Click "Add Resources"
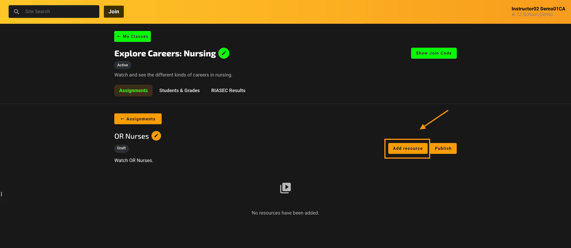
- Now you're able to search for resources from the Edge Factor Library.
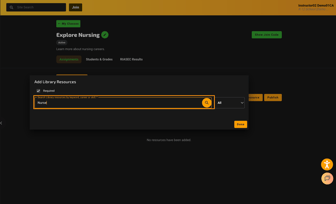
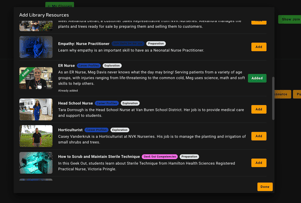
- You can search for resources by name or keywords. Once you've found the resources you need, click the "Add" button.
- When the resource has been added to your assignment, the "Add" button turns green and says "Added."
Tip: You can add more than one resource at a time. Each of the resources is labelled with the series name (e.g, Career Profile) and the phase of the career journey (Inspiration, Exploration, or Preparation).
Step 3: Publish & Share
- Once you have added all the resources you'd like your students to complete, click "Publish."
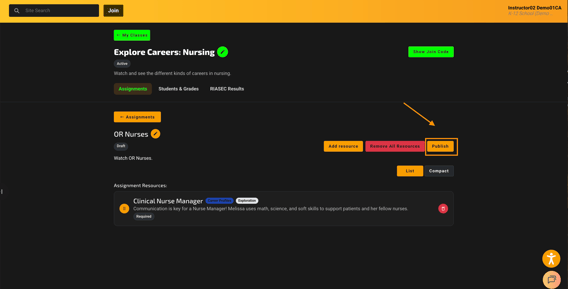
Tip: You're able to add additional resources, remove all resources, and delete individual resources (using the garbage can). Only when an assignment is "Published" can the students in the class (who join with the code) access the assignment to complete.
How to view your list of Students & Grades?
Step 1: Go to "My Classes"
- On the side nav bar, click "My Classes."
- Then click on the class you'd like to view students and grades.
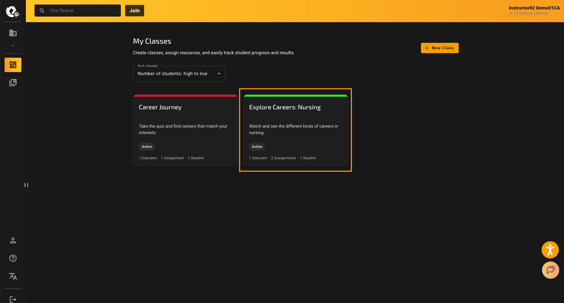
Step 2: Click on Students & Grades
- Click on the Students & Grades tab
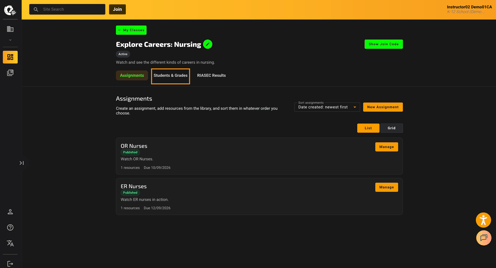
- Then you can review when each student joined your class, the assignments completed, score or grade, and number of attempts to complete.
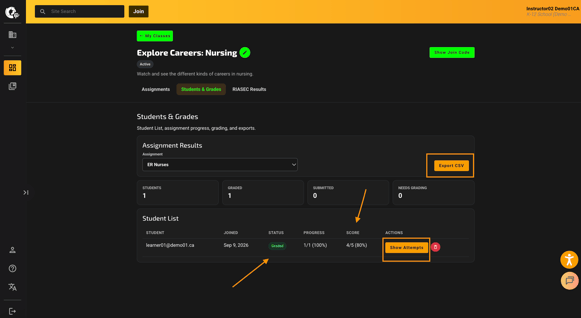
Tip: You can export students and grades to a CVS file and import into your digital mark book.
-
Need Help?
- Need help managing My Classes? Not a problem, we're here for you! Visit k12.edgefactor.com/support and book a quick training session.
- Need help managing My Classes? Not a problem, we're here for you! Visit k12.edgefactor.com/support and book a quick training session.